How to make DIY Puja thali for Raksha Bandhan?
Raksha Bandhan has finally knocked on the door and is waiting for all of us to open the door and celebrate the festival. But, with Raksha Bandhan standing right next to us, it is crucial to see whether we have done all the preparations for the festival or not.
Starting from the essentials, you need a beautiful silver Rakhi, sweets, gifts, a beautiful attire to get ready, some accessories, and a lot food to enjoy with your family. But what about the puja thali that you are supposed to use for the rituals?
A puja thali is crucial to perform any ritual in Hinduism. If you have not bought a new puja thali for Raksha Bandhan rituals you can quickly make your own DIY Puja thali for the festival. Let us explain you in detail about the steps to make puja thali at home. It will give a very personalized touch to your celebrations.
Steps to make puja thali at home
A DIY puja thali is super easy to make and perfect to use for simple rituals like Rakhi tying. Below is a step-by-step guide to follow that will help you make your own puja thali in no time. So, let us get started.
Material required:
- A thick and sturdy cardboard
- Decorative papers
- Glue and scissors
- Beads, mirrors, and pearls
- Decorative golden gotta flowers
- Tassels
How to begin:
Step 1: Cut a round shape out of the cardboard sheet. Make sure the circle you are cutting out is big enough to work as thali. It does not matter if you have an old and strained cardboard as everything will be covered with decorative material. Just make sure the cardboard is sturdy and will not get easily affected with the decoration and rituals.
Step 2:Now, take a beautiful and colourful sheet of paper and cut a circle out of it as well. Remember to cut the circle of bigger in size than the cut out of the cardboard. That is because this paper is supposed to be wrapped on the cardboard sheet and will work as the base of the thali.
Step 3: Paste the cut out on the cardboard and carefully stick the extra ends at the back of the cardboard to secure the paper and give the cardboard a finished look even from the ends.
Step 4: Now, take out another sheet of paper that matches with the base sheet and cut out thin and long strips from the new colourful sheet. If you want, you can use ribbon instead of paper in this case but paper will work more practically than ribbons. So, I suggest you to cut our paper strips for this step.
Step 4:Now, paste these strips on the thali in a crisscross manner and secure them at the backside of the thali. Let it dry for a while before you move to the next step.
Step5: Take out mirrors and put them on the cross section point of the crisscross pattern. Add mirrors on each intersection but leave the intersections at the ends of the thali. Pasting them on the ends is of no use as we are leaving it for something else.
Step 6: Remember the golden coloured gotta flowers we asked you to add in your requirement list? Those are supposed to be added on the corners of the thali. Add them one by one on the circumference of your DIY puja thali and leave no space in between. It should cover the ends of the thali completely.
Step 7: Take out colourful beds or pearls and paste them at the center of the golden gotta flowers attached on the sides of the thali. Here the choice is completely yours whether you want to add white pearls, colourful beads or want to leave the golden gotta flowers as it is.
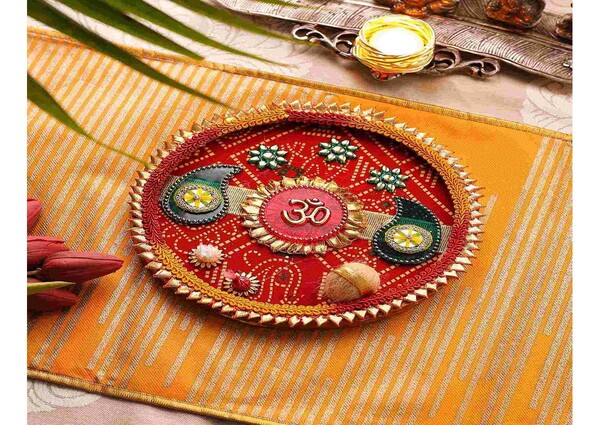
Step 8: It is time for the final touches. Start pasting the last thing that is left with you i.e., tassels. According to their design, they are supposed to be pasted at the corners of the thali and fall downwards for the perfect look. Remember to have matching colours for them as well according to the colour scheme of the thali. Also, you do not have to paste them without leaving any space in between. Paste 4 to 5 tassels at equal distance from each other. And let them fall down beautifully, upscaling the look of the puja thali for Raksha Bandhan.
Now, your Puja thali is ready t perform the rituals. But there are a few things you must keep in mind to make the thali pitch-perfect for the occasion. Let us have a look at those details.
Things to remember
Creativity needs some precautions so that the results can come out beautifully. Keeping these points in mind will make sure your beautifully made DIY puja thali for Raksha Bandhan celebration is not ruined in any which way.
- Before you start, plan the entire theme of the DIY puja thali. It must look well-coordinated and not something you randomly decided to do.
- Give time to each addition you do on the thali to dry out completely before you paste next item on the plate. Wet fevicol can ruin things like a blunder which you surely not want to happen with your precious piece of creativity.
- Paste the ends of the paper properly otherwise the thali will give a messy look. It will not take much of you time to let paste all the ends properly and wait for them to dry.
- Everything that we are using to create the DIY puja thali is easily flammable. So, once you are done with the rituals, remember to remove the Diya or earthen lamp from the thali.
- Having an extra big homemade thali will work perfectly but bot a small thali. You have to keep multiple items on it. remember to have correct size of cardboard before you begin.
How to prepare puja thali for Raksha Bandhan rituals?
Now that our beautiful puja thali is ready to serve us on the festival, let us quickly revise how to prepare puja thali for Raksha Bandhan rituals.
Material required for Raksha Bandhan rituals:
- Rakhi
- Sweets
- Roli and Chawal
- Flower petals
- Earthen lamp with oil and wick (Diya)
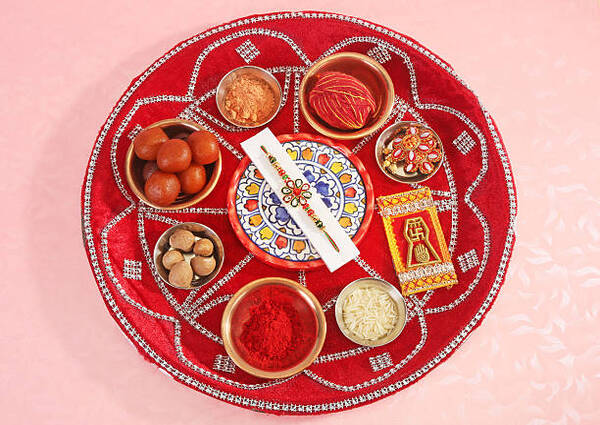
How to place items on a thali to perform Raksha Bandhan rituals?
- Place the earthen lamp in the center of the DIY puja thali as it is meant to perform the aarti.
- Add flower petals at the side of the earthen lamp as you have to sprinkle them on your brother after performing the arti.
- Place the mixture of roli and chawal at the side. These are meant to be applied on your brother’s forehead before you start performing the arti.
- Place the Rakhis at another end and sweets beside the rakhis. The sweets will be offered after the entire ritual will be over.
These are the auspicious items that will adorn your DIY puja thali for Raksha Bandhan rituals. Quickly reminiscing how you have to use all these items one by one. start with applying the tilak on your brother’s forehead, then tie him the Rakhi on his right hand. Next, start performing the arti using earthen lamp and rotate it clockwise in front of your brother’s face. Then sprinkle some flowers on his head and offer him sweets.
The Rakhi tying ritual using the homemade DIY thali is complete. Now you can exchange gifts and Raksha Bandhan gift hampers with your siblings and enjoy the yummy food with each other.
Conclusion:
Raksha Bandhan is a very special festival that involves a lot of emotions and even more preparations. But it is the efforts that count for the things that matter. Like a sister whole-heartedly decorating the DIY puja thali for Raksha Bandhan rituals, buying the most beautiful designer Rakhi for her brother, and getting all dressed up for the occasion.
Similarly, the brother buying a heartfelt gift foe her sister and buying her favourite sweets to spoil her with all his love. Raksha Bandhan is the festival of bonding, strengthening ties, and celebrating the occasion together. So, dissolve in the rich festivities of Raksha Bandhan by creating the most beautiful DIY puja thali for your brother and celebrate a happening festival.